18
Elevating Your Online Presence: A Rundown of Facebook Ads
The realm of online advertising is constantly evolving, so it’s easy to get lost in the shuffle. However, by mastering the basics you’ll not only be ahead of your competitors, but you’ll also be able to better reach your audience. Today, we’re going to be covering something everyone should be in the know about: how to advertise on Facebook.
As Facebook evolves so too does the way our content is seen, and it is becoming more apparent that the best way for your content to increase its reach is through Facebook Ads. By using more strategic targeting, you have control over how far your content can reach. Additionally, you can decide who you want to see your content to ensure your audience is a qualified one. With proper targeting, you have the ability to directly impact how well your content performs. With that in mind, let’s start the process.
Step 1. Determine Your Goals
Before trying your hand at making ads, it’s imperative to first know what you are trying to achieve with them. By setting a goal, you will have a way to measure your success. Some goals could be:
- Generate new leads
- Increase page likes
- Garner increased page engagement
- Acquire new patients
Whatever it may be, as long as you have a goal in mind you can more effectively begin the ad creating process.
Step 2. Locate Your Ads Manager
This might seem confusing at first, but taking a quick tour of the Ads Manager can easily take away those worries. What you’ll want to do is click “Manage Ads” in your dropdown menu.
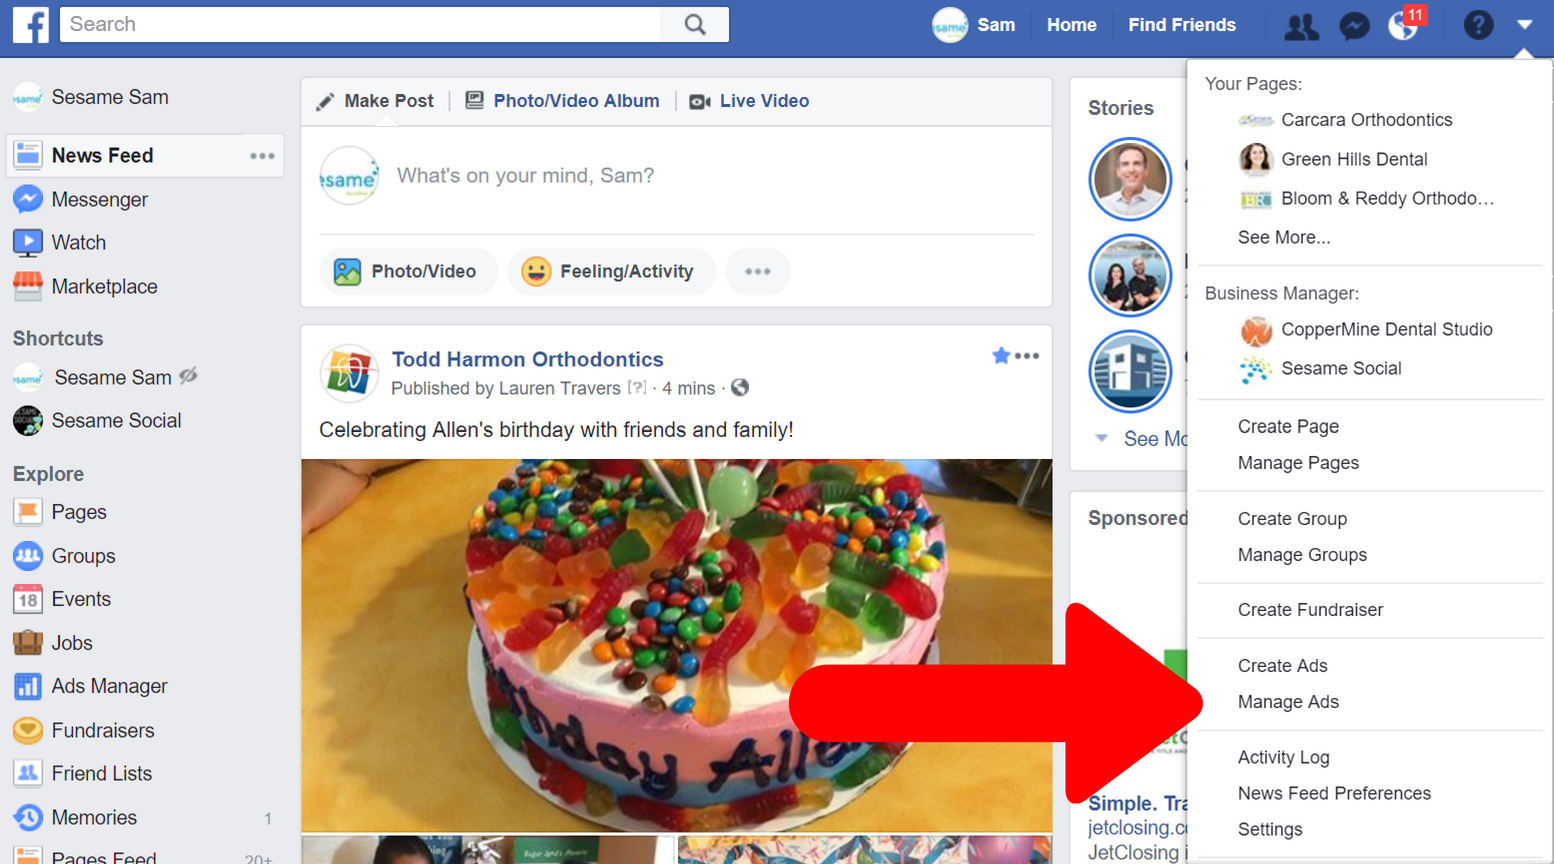
Once there, simply click your profile and you’ll be taken to the following page.
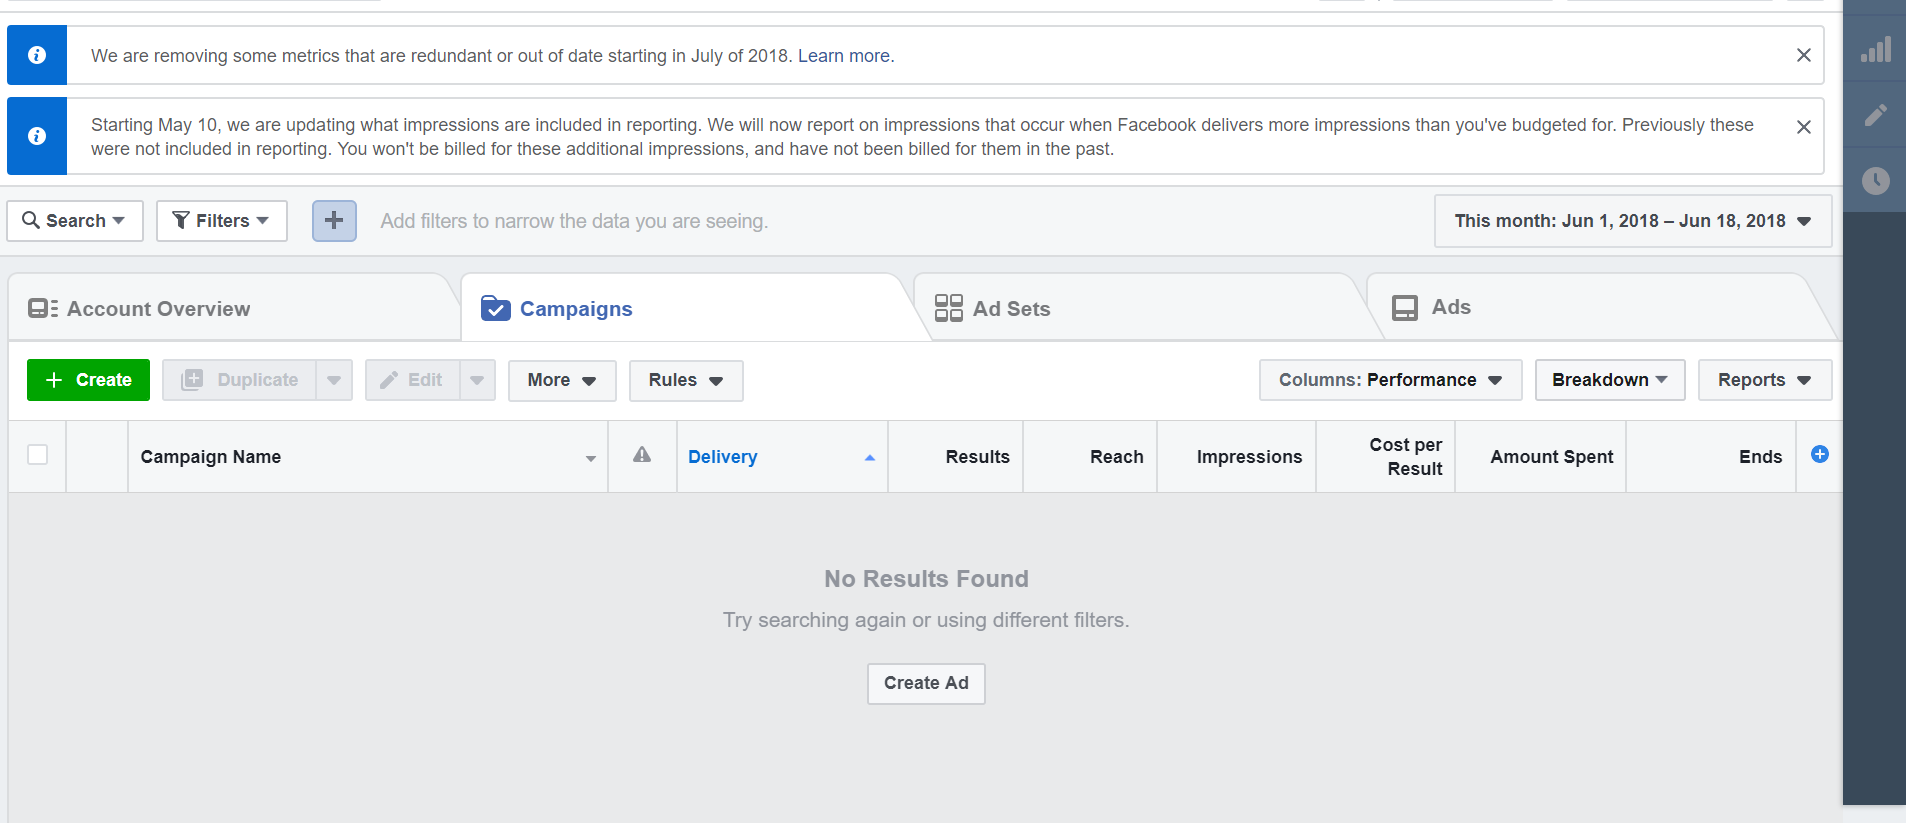
Now that we made it there, we can begin the process of creating ads!
Step 3. Find Your Marketing Objective
From the page we left off on, click the big green button that says “Create New.” This will take you to a screen where you’ll choose your objectives.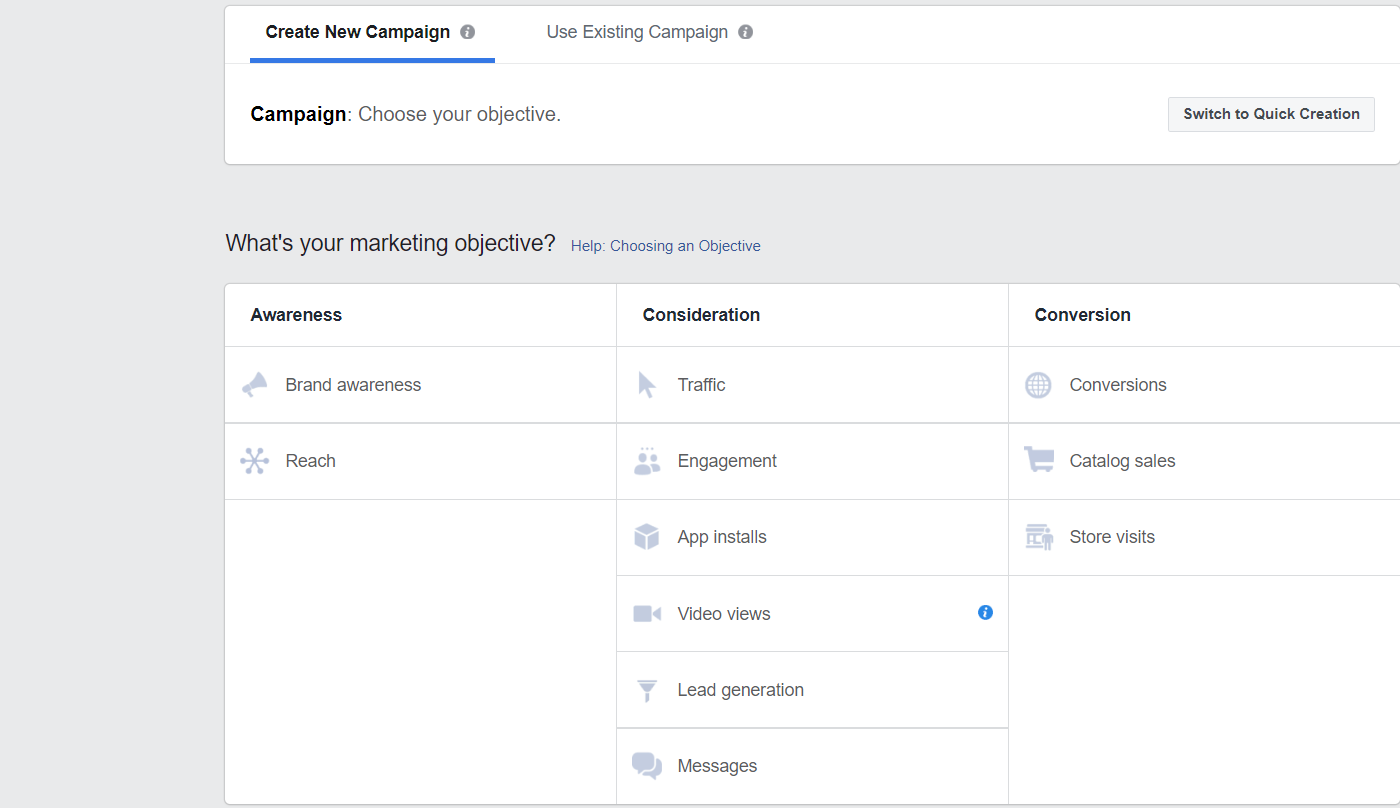
Each objective category has its own purpose.
- Awareness
- Generating interest
- Boosting your page
- Aiming for increased Brand Awareness
- Consideration
- Aims to get individuals to remember your business/brand
- Send people to destinations on or off Facebook (like your website)
- Collect leads
- Conversion
- Aims to get people to purchase or use your service
- Help increase conversions on websites (think online appointment request)
- Push people to claim an offer you might have running
After selecting your objective, you’ll name the ad and then be taken to the next step.
Step 4. Finding Your Audience & Setting Budget
This is where strategy comes into play. This screen allows you to pick your target audience and determine how much you want to spend.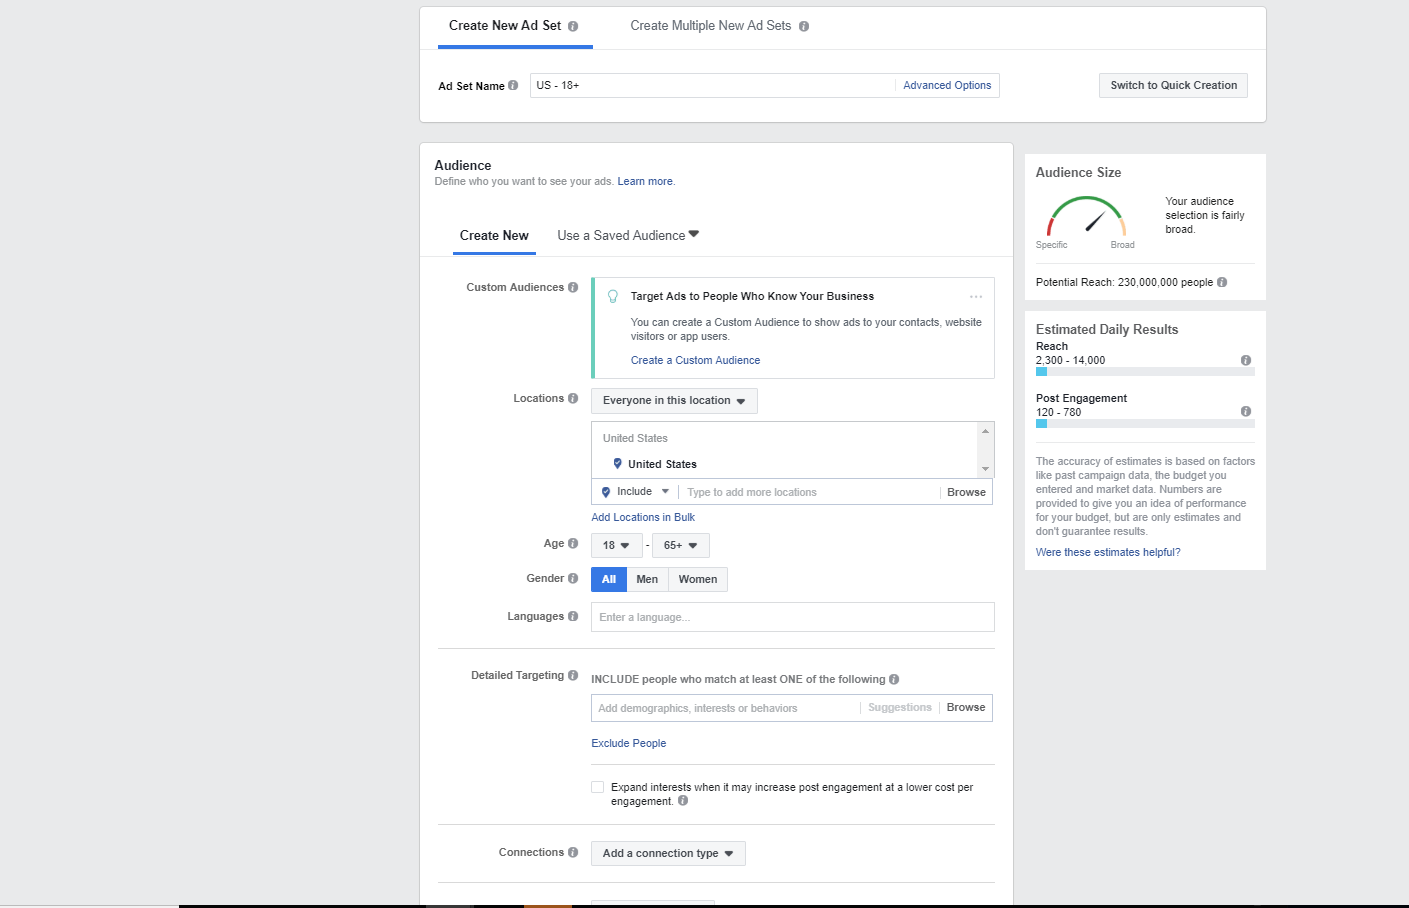
The breakdown for the targeting is as follows:
- Location
- Country, state, city, or zip code and refining even further with a mile radius
- Age
- Gender
- Languages
- Detailed Targeting
- Includes interests, demographics, and behaviors
- Connections
- Choose to show the ad to all people, just those connected to your Page, or those not connected to your Page
Now, at first, you might want to target broadly get everyone to see your ad, right? Not the best idea. You see, having a broad audience might sound good in theory, but the broader your audience, the higher the likelihood of people ignoring your ad. For example, you might want to increase your page likes, so you set your targeting to everyone in your state.
After $100 is spent, 100,000 people might see your ad, but only 120 people liked your page after seeing the ad. Not exactly a great conversion. But what about $100 spent on a narrower audience? 10,000 people are reached, and 800 likes are gained. By narrowing it down and truly defining your audience, it’s more likely that qualified individuals will act on your ad.
Now, onto the budget.
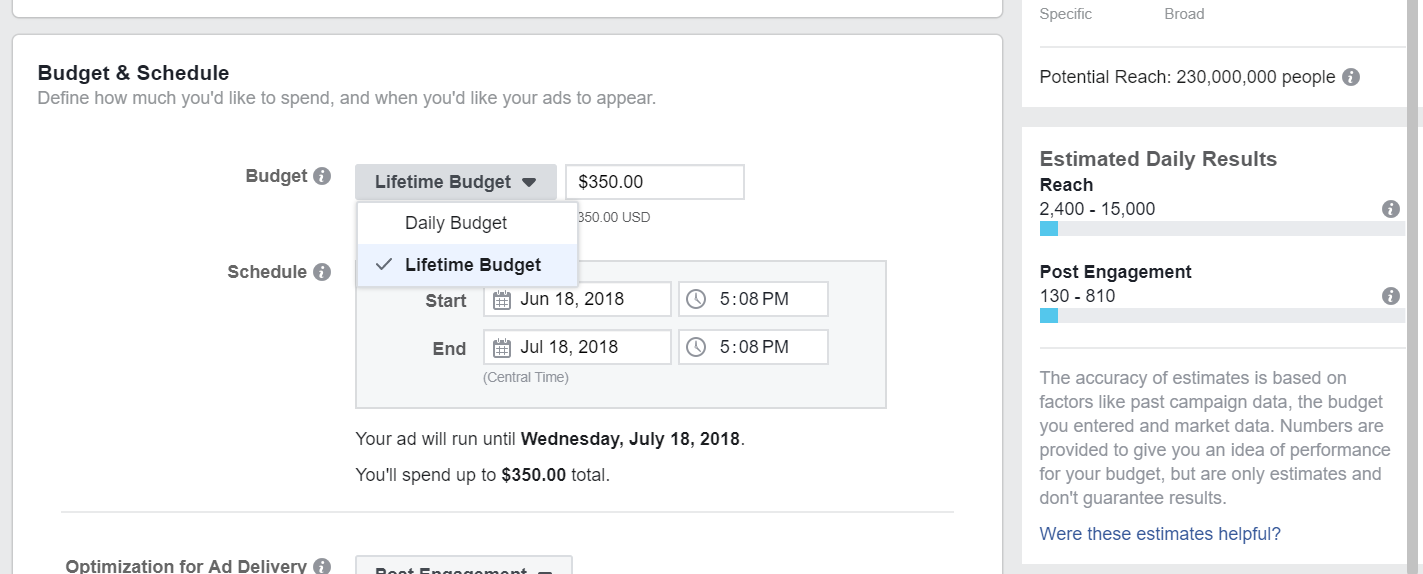
Here you will be able to set how much you want to allocate towards your ad. It’s broken down into two options.
- Daily
- How much money you’ll spend a day
- Lifetime
- The max you’ll spend over the scheduled time you placed
Step 5. Finalize the Ad
After setting your audience and budget, you’ll be taken to a page where you can either create an ad or use an existing post to put money behind.
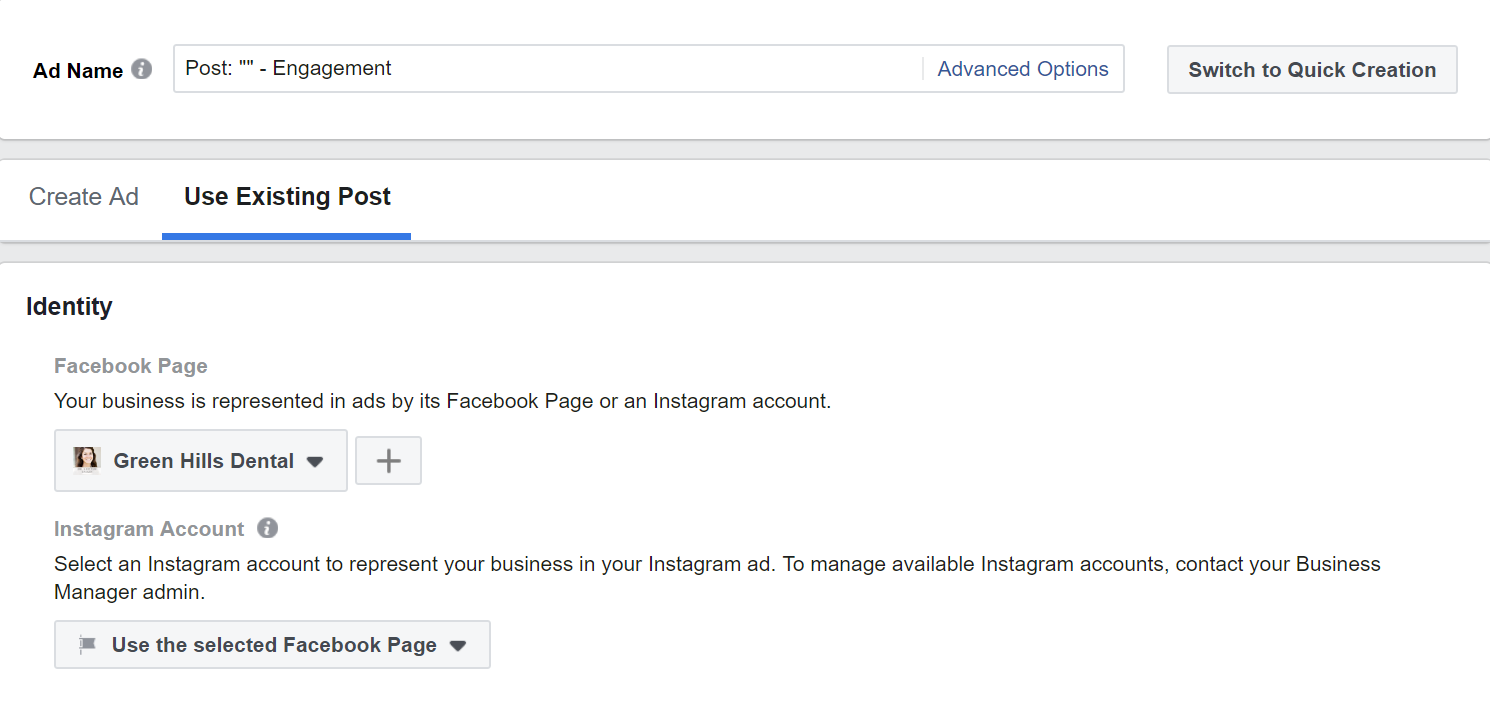
When creating an ad, Facebook provides you with different formats you can choose, images (or you can add your own), and so on, making the creation process very user-friendly. For using an existing post, Facebook will allow you to select a post you may already have on your page or one that is scheduled to go out. Once you have your post ready, there is one last step to be done.
Step 6. Confirm!
Finally, click that big green “Confirm” button and your ad is sent off to Facebook for a final check before they approve it. Once approved (you’ll get a notification on Facebook of whether or not it is approved), the ad will be placed and be ready for viewing by your designated audience. Congrats, you made your first ad!
____
This is a fair amount of information to take in all at once, but give it time and practice and before you know it, you’ll be able to navigate the Ad Manager tool with ease. Facebook also offers multiple teaching methods and tools to help you figure out the process of creating ads, so don’t forget to utilize them.
While we don’t offer our Facebook Ad service just yet, it’s something we are working on and will hopefully implement soon. Be sure to be on the lookout for when that drops!
– Adrian Vargas, Social Media Specialist, Sesame Communications